
Planning a trip to Japan can be intimidating; I was when I first started. So after a successful trip, I’m here to share how to prep for a trip to Japan. The language barrier had me stumbling over destination names that all looked alike. To put together my Japanese bucket list, I thought I would have to make flashcards.
My Trip to Japan
For this trip, I was taking only one of my three children. She was an exchange high school student studying abroad in Tokyo. So I wanted to take her to Japan and explore before she started school.
I planned a classic trip exploring the best of Japan, starting and ending in Tokyo. Then I continued to Japan’s cultural center in Kyoto. Afterward, we headed further south to Hiroshima to reflect at the Peace Memorial Park with a side trip to Miyajima.
With a limited budget, my itinerary is cost-conscious. I used public transportation and a Japan Rail Pass, ate on the cheap and stayed in smaller, less expensive rooms.
My Japanese Itinerary
Tokyo for 3 Days
Kyoto for 4 Days
Hiroshima and Miyajima for 2 Days
Mount Fuji for 1 day; however, I would not do that again. Public transportation was tedious and the view was limited. I would visit Nara instead.
Top 19 Things to Do in Tokyo in 3 Days

What to Eat in Japan
Japan offers a rich culinary heritage. The food found in Tokyo is considered some of the best in the world. So dive in and sample. As a bonus, I found cheap eats with snacks for about 100 Japanese yen and lunch for 1000 Japanese yen.
Sushi—A Must!
Yakitori—Meat and vegetables skewered then grilled and served with beer or sake, a local favorite after work.
Dumplings—Originally from China, but Japanese gyoza are excellent. Pork steam buns are good too.
Noodles—Soba, Udon and Ramen are musts.
Mochi—Sweet confections made of rice and flavored with assorted seasonal flavors.
Green Tea Ice Cream—In the summer, it’s found on every street corner.
Japanese Kit Kats—Find lots of different flavors, and Kit Kats are a great souvenir for kids.
Department Store Food Halls–Usually located in the basement, a solid option for bento boxes and sushi. A must for train rides.
Japanese Food Markets—Both Tokyo’s Tsukiji Market and Kyoto’s Nishiki Market offer lots of options for sampling.
Vending Machines—Virtually every street corner offers a variety of cold beverages; keep coins in your pocket.
If you’re intimidated by Japanese food, then I recommend a food tour. My English-speaking guide offered insights into Japanese dining customs as we sampled food across Tokyo.
Tips on Dining in Japan
Learn how to use chopsticks before your trip.
Western silverware is available in most places.
English menus are usually available; if not, most menus offer pictures.
Tipping isn’t customary.
The Japanese frown on eating and walking, including in the food markets and food halls.
Japan shouldn’t pose any concerns with water or food sanitation.
Water in hotel rooms is safe to drink.
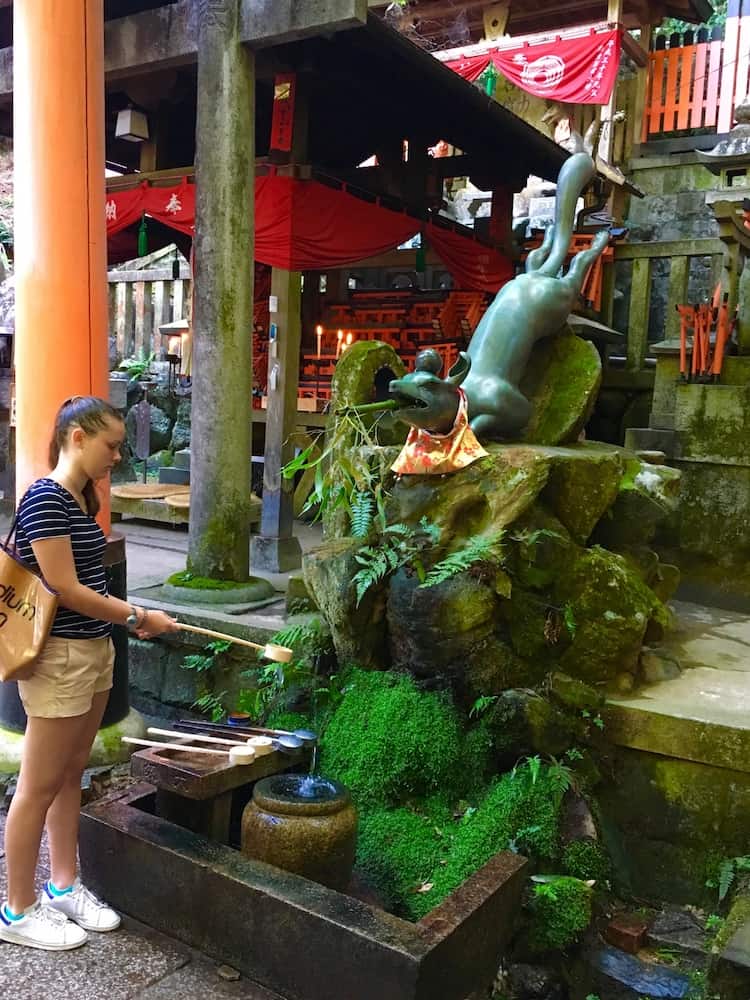
Visiting Japanese Shrines and Temples
To experience the Japanese culture and UNESCO World Heritage Sites, most visitors explore shrines and temples. So what’s the difference?
A shrine features a simple torii (a red gate) to separate the human world from the spiritual world. A temple features a larger gate that resembles a building and Buddhist images.
Ritual Cleansing for Shrines and Temples
It’s customary to cleanse yourself before entering a shrine or temple. It’s respectful to the other visitors, so I’ll walk you through the steps.
Find the water basin with clean water and ladles.
Grab a ladle with your right hand and fill the ladle with water.
Pour water on your left hand, then switch hands to pour water on your right hand.
Pour a bit of water into your hand to rinse out your mouth. Don’t spit into the clean water basin.
Then clean the ladle for the next visitor by allowing the remaining water to flow down the ladle’s handle.
Replace the ladle in the rim of the water basin.
Approaching Shrines
After cleansing, it’s time to approach the shrine. Follow the following steps.
Bow slightly.
Add change to the box and the amount doesn’t matter.
Ring the bell if there’s one.
Clap twice.
Pay respects.
Finish up with another bow.
Approaching Temples
After cleansing, approaching a temple is similar to approaching a shrine.
Light some incense from the fire nearby.
Bow slightly.
Add change to the box and the amount doesn’t matter.
Ring the bell if there’s one.
Bow head with hands held together.
Finish up with another bow.
Visitors routinely buy wooden plaques for requests or amulets to ward off evil. Or purchase a fortune. Even incense or simple beaded bracelets can be purchased for souvenirs.
Do’s and Don’ts of Visiting Shrines and Temples in Japan

Places to Remove Shoes in Japan
Remember those socks and easy on-and-off shoes when visiting Japan. Many sights require you to remove your shoes.
Most temples and shrines
Smaller hotels
Private homes
Schools
Restaurants where diners sit on cushions.
16 Japanese Holidays to Celebrate While Visiting Japan
Using Money in Japan
Japan uses cash, a lot of it. I found this surprising since I rarely use cash when traveling.
So I ordered Japanese yen through my bank before I left, since banks usually offer better exchange rates. I recommend this option, so order currency about a week before your departure date.
Don’t carry all the Japanese yen for your trip since you might lose it or fall victim to crime. Even the safest countries have thieves and pickpockets.
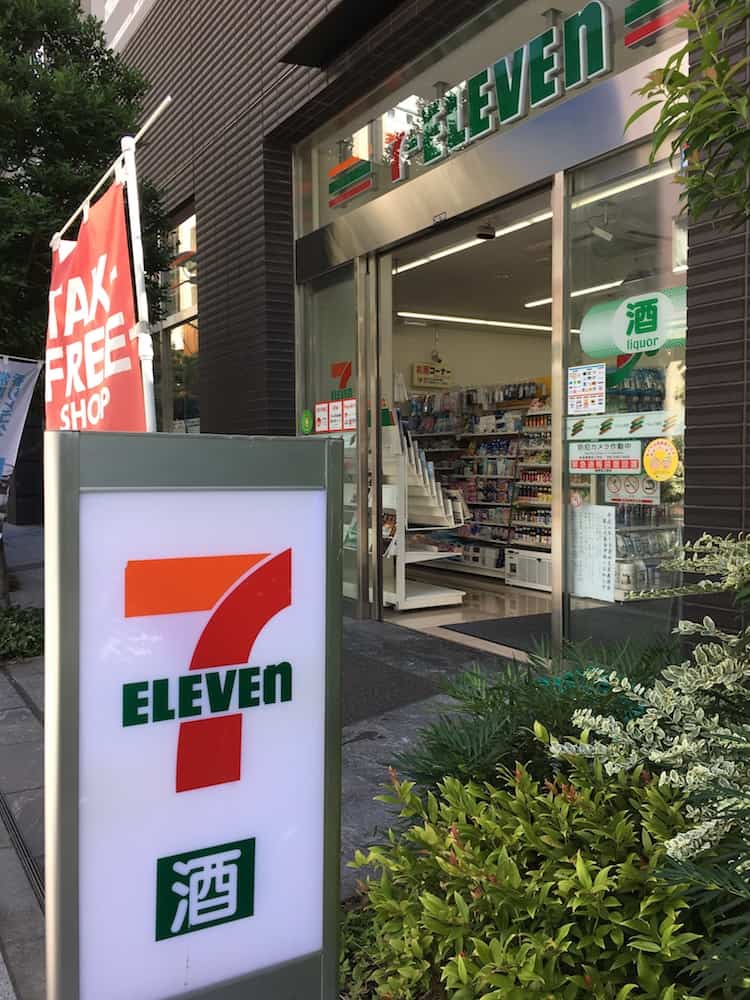
To get more yen, I used my bank’s ATM card at the 7-11 convenience stores. I found stores everywhere, and it connects with most North American banks.
I withdrew money twice in two different cities with no problems. Just remember to inform your bank and credit card companies of your travel dates and destinations. Or it might decline your card for suspected fraud.
Have lots of change readily available. Japanese yen comes in 1 yen, 10 yen, 20 yen, 50 yen, 100 yen (about $1 during my visit) and 500 yen coins. Paper notes start at 1,000 yen, with 5,000 yen and 10,000 yen notes readily used.
I used my credit card for purchases over $100 and all transportation and hotel expenses for added protection.
What to Expect at Japanese Hotels
Since I was traveling with only my daughter, I booked smaller, more economical rooms. I chose to stay at Japanese hotel brands rather than global hotel brands.
I did this to save money since the global hotel brands like Hilton, Westin, and even Best Western were expensive. With properties catering to North American travelers, the additional room space came at a premium.
The Western-style hotel rooms in Japan were small. Since I needed to stay on budget, I was willing to give up a little space. After exploring all day, I needed a hot bath and a comfy bed.
The double bed usually butted up against two walls. I found a little walking space around each of the two sides. And some rooms featured a futon for a third guest.
There wasn’t a lot of space for luggage, and we each had carry-on-sized wheeled luggage and a backpack. Larger luggage would’ve been a storage problem. Closets are a luxury so not included in most budget rooms.
The bathroom offers small tubs with hand-held showers. The vanities feature small sinks, though lots of complimentary toiletries. I found razors, toothbrushes, and paste in most rooms.
The magical Japanese toilets are a marvel for the typical Westerner. It offers a warm seat. A bidet feature that the kids love to turn on. Some even feature music to mask the sounds of toilet business.
The only issue I had with the magical toilets of Japan was figuring out how to flush them. It’s not as obvious as it seems.
My rooms included free WiFi, a small refrigerator, a water kettle and pajamas or robes along with slippers. The hotels featured coin-operated launderettes, and some offered spa services.
I spent one night in a Japanese-style room. It was basically a mat-lined open room with futon mattresses and bedding for each guest. The room included a low table and cushions for sitting. No additional amenities, though my room had air-conditioning.
If it’s your first experience in a Japanese-style room, limit it to one night.
My Hotels in Japan
I looked at the individual Japanese hotel websites and found that they lacked the functionality of North American hotel websites. I didn’t want my reservation to get lost in translation, so I used a US-based hotel app.
As a backup, I printed out all my reservation sheets that featured the important information in Japanese, like my name and the hotel’s address. I recommend doing this. However, most of the hotel clerks spoke English.
I found the rooms were exactly what was pictured on the Hotels.com website. I stayed in western-type rooms most nights. Though I tried a traditional Japanese-style room outfitted with futon mats for one night.

Getting to Japan
I live in Texas, and fares departing out of Dallas/Ft. Worth and Houston Intercontinental were expensive. So I did a little research.
I’m a former flight attendant for American Airlines, so I know some secrets. I always check markets with lots of competition. For Japan, that’s the West Coast.
I looked at all the departure points–Los Angeles, San Francisco, Seattle and San Diego.
Keeping the codeshare airlines in mind to maximize points, I found the cheapest airfare to Tokyo’s Narita Airport on Japan Airlines. JAL codeshares with American Airlines, so I compared the airplane and the service between the two airlines.
JAL offered a Boeing 787 Dreamliner on the San Diego-Narita route with a higher level of service in economy. And I could check two bags per passenger for free on JAL, a nice bonus that saved a minimum of $25 a bag.
After purchasing my seats through American Airlines for the JAL flight, I made reservations for my connecting flight. However, I scheduled the first flight of the day and included over four hours of time between flights, just in case.
Tips for Finding Lower Fares
I fly a fair amount and I am always looking for the best deal along with the most generous baggage allowance. And I belong to loyal programs and airline credit card holder to the majority of the larger carriers in the U.S. So here’s my quick tip list for finding cheaper fares.
Look at markets with lots of competition and check out smaller airports too.
Look at international airlines, especially ones that codeshare with your favorite North American carrier.
Don’t be afraid to get tickets through different airlines, though, add enough time to recheck your bags from one flight to the next.
Saturdays are usually less expensive than Fridays and Sundays. Tuesdays and Wednesdays offer savings as well.
The first and last flights of the day are usually less expensive and less crowded. As a bonus, the first flights of the day have fewer weather delays, and you never have to wait for the airplane to arrive since it spent the night at the airport.
Know the weather at the airports during the seasons. I stay away from Midwest hubs since thunderstorms and blizzards can shut down operations
30 Japanese Snacks You Must Try
Getting Around Japan
I have an international driver’s license, but I didn’t want to drive in Japan. It uses the left lane and the left side of the vehicle to drive. And the street signs aren’t usually in English, so I advise first-time visitors to skip driving.
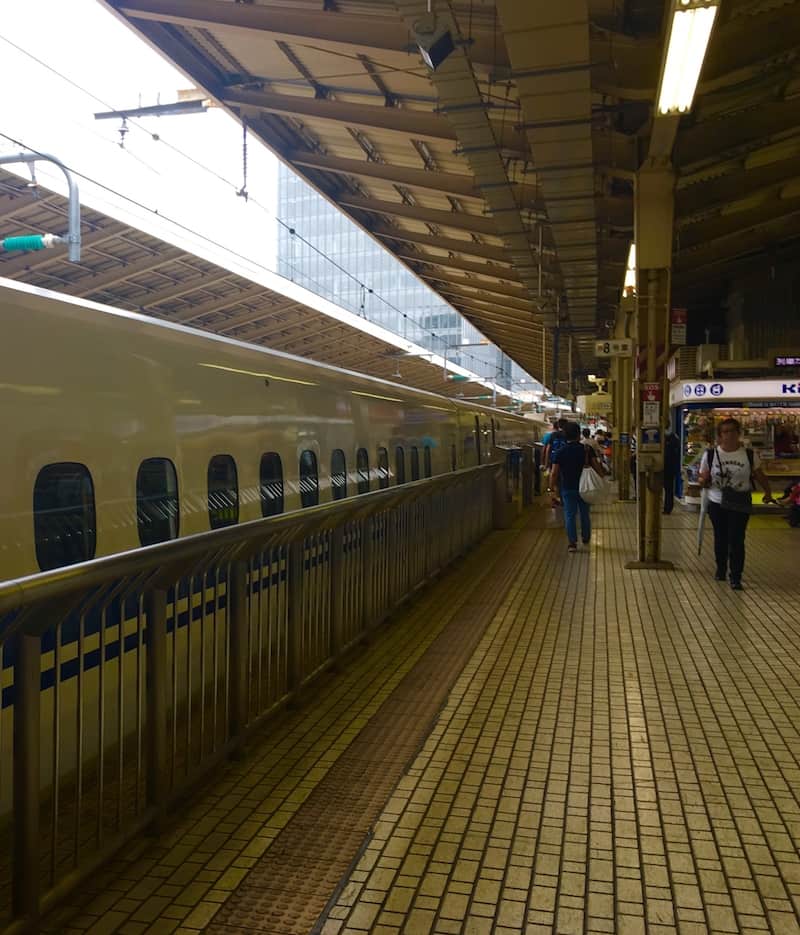
I used the Japanese Rail System and each city’s subway and bus system to get around. It was an efficient and cost-effective way to travel in Japan.
How to Buy a Japanese Rail Pass
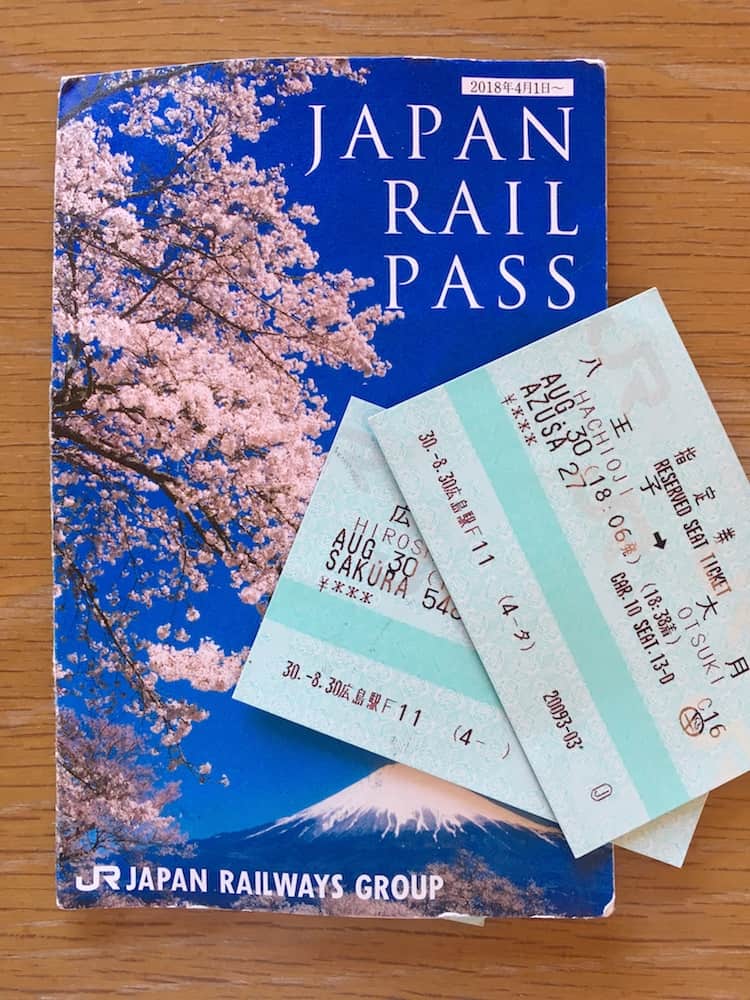
Reserve a JR Pass before you leave. It’s only available for tourists on a 3-month tourist visa.
Step 1
Purchase a JR Pass through an authorized online agent.
Decide how many days you will be traveling on the trains within Japan. In my case, I bought a 7 Day JR Pass to save a few dollars. Japan Rail offers passes for 7 Days, 14 Days and 30 Days, with adult and children’s pricing (under 12).
TIP: Remember, you’ll need a train ride to get to Central Tokyo from Narita International Airport, via Tokyo Terminal or Shibuya Terminal, on a JR train. Since I was staying in Tokyo for the next four days, I didn’t want to pay extra for the 14-day pass, which is more expensive than a round-trip JR ticket between Tokyo and Narita.
Step 2
The Japan Rail Agent will mail you a JR Exchange Order, usually sent out the next day and delivered within seven days. The JR Exchange Order is valid for a JR Pass within three months of purchase.
After arriving in Japan, the JR Exchange Order will be exchanged for a Japan Rail Pass at the JR office. So pack it in your carry-on with your passport.
When you arrive in Japan, an immigration agent will attach a tourist visa to your passport. This visa is good for sightseeing for three months in Japan.
Step 3
Head to the JR East Travel Service Center downstairs, located in Terminal Two of Narita International Airport’s International Arrivals area. A JR agent will look over your passport and ask when you want your JR Pass to start.
TIP: Make sure that this day is the first day of train travel. The JR Pass will not be activated until your first trip.

Attention Last Minute Travelers
It’s possible to get a JR Pass at Narita International Airport. I did. Head to the JR East Travel Service Center downstairs, located in Terminal Two of Narita International Airport’s International Arrivals area, after you arrive. It just costs a few more yen, but it offers savings over purchasing individual tickets to destinations outside of Tokyo.
Step 4
Study the timetables and make a reservation for your assigned seat at a JR ticketing office. Each office offers a dedicated English speaker in tourist areas.
Or you can just walk up to the JR Ticketing Office and ask for reservations for the next departing train. I did this. Just grab your snacks and beverages before the ticket office.

Subways and Buses in Japan
Each city I visited offered a public transportation system to tourist attractions. Some cities offered special bus routes for popular destinations, like Hiroshima and Kyoto. Others, like Tokyo, offered a comprehensive system of buses and subways.
When you arrive, head to the subway ticket machine and purchase a PASMO or SUICA refillable card. Each offers swipe-and-go convenience that calculates transfers and fares on its own. Just keep an eye on the balance available after swiping your card at the subway turnstiles.
Luggage Delivery Service in Japan
Hauling large luggage in the trains across Japan sucks. Pack light. I used my standard carry-on-sized wheeled luggage, paired with a backpack.
For my 12-day trip across Japan, I packed about four outfits along with outerwear. I just wash clothes every few days. All the hotels I reserved in Japan had coin-operated launderettes. My delicates dried in the bathroom overnight.
For visitors on extended stays, consider a Luggage Delivery Service. After arriving at Narita International Airport, clear customs and claim your checked luggage, then head to the Luggage Delivery Service Office.
The delivery price is based on weight, location and number of pieces to be delivered. Delivery is usually the next day for Tokyo addresses, and longer for other destinations.
Since my daughter is an exchange student, we did this for her two oversized bags. It was delivered to her host family’s address the next day without incident. Remember to lock up your luggage with a TSA-approved lock.
Staying Connected in Japan
Will you need data when traveling in Japan? Yes.
You will need the navigation apps on your phone. During my trip, I used my navigation app constantly to use the public transportation system. Then I used it to find smaller locations, like some of my hotels.
Since I do a fair amount of international travel, I have an international plan for my cell phone which includes unlimited data. This is the easiest option, so research that with your carrier. It only requires you to shut down to your phone and power it up to find the Japanese carrier. Or you can add an E-sim to your phone.
I had constant coverage across Japan, though I stayed in the urban areas. Japan does offer free public WiFi, but each one wanted an email address. I didn’t want to provide that,t so I never used the free public WiFi.
The complimentary hotel WiFi varied greatly. Some hotels offer it for a daily charge. I haven’t used this service yet it’s available for travelers.
Packing List for Japanese Exchange Students and Teachers
Do You Need Shots?
I looked over the CDC website for traveling to Japan, including required immunizations. I usually recommend a trip to the travel clinic, especially when visiting Asia. No special immunizations were required outside those normal adults need to have.
Even the safest destination isn’t immune to TD. So I start taking probiotics before and during my trip. I also drink a daily dose of Emergen-C, especially after long international flights. I packed some over-the-counter medications for TD symptoms since it’s the most common illness during any travel.
Fear of TD–Traveler’s Diarrhea
I have a fear of TD. Who has time for that?
So I pack all the supplies I might need in case of tummy troubles. Here’s what the CDC recommends.
Antacid—like Tums
Pepto-Bismol tablets
Imodium tablets
Oral Rehydration Salts—available at REI
Prescription Antibiotics—prescribed by a doctor or nurse practitioner based on your itinerary.
First Aid Supplies for Travelers
Accidents happen anywhere, so pack a basic first aid kit to be prepared. More often, it’s the pain reliever and bandages that get used first.
Pain Reliever
Bandages
Motion Sickness Pills, like non-drowsy Dramamine
Cough Drops
Cold Medication—I prefer a separate Day and Night version.
Anti-Histamine—like Benadryl
Triple Antibiotic Cream—like Neosporin
Anti-Itch Cream
Anti-Septic wipes
Sunscreen
Inspect Repellent
Consideration for brands mentioned. This post contains affiliate links.

Comments are closed.